

How to Create Your Own Custom Jewelry Piece: A Step-by-Step Guide
Custom jewelry is a great way to express your individuality and creativity. Whether you’re looking for a special piece to mark a milestone or want to create a unique gift for someone special, making your own custom jewelry is easier than you might think. In this step-by-step guide, we’ll walk you through the process of creating your own custom jewelry piece from start to finish.
Step 1: Choose Your Design
The first step in creating your own custom jewelry piece is to choose your design. This can be anything from a simple pendant to a complex bracelet or necklace. Take some time to think about what you want your jewelry to look like and sketch out some ideas.
Step 2: Choose Your Materials
Once you have a design in mind, it’s time to choose your materials. This can include everything from the type of metal you want to use to the type of gemstones or beads you want to incorporate into your design.
Step 3: Gather Your Tools
Before you start creating your custom jewelry piece, you’ll need to gather your tools. This can include everything from pliers and wire cutters to a jewelry saw and a soldering torch.
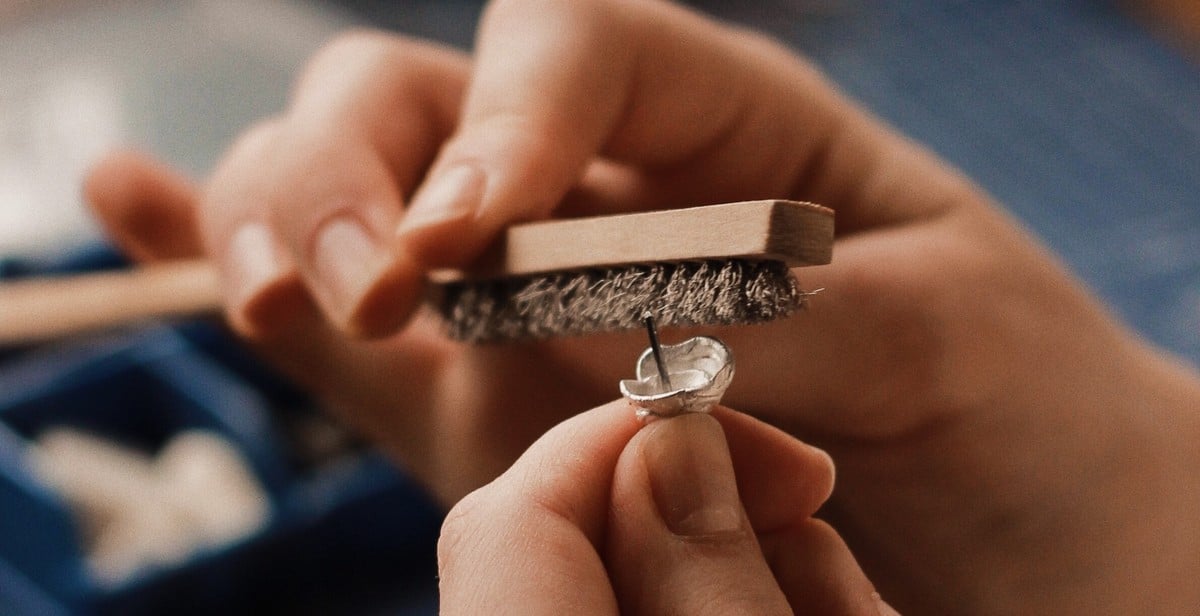
Step 4: Create Your Jewelry Piece
With your design, materials, and tools in hand, it’s time to start creating your custom jewelry piece. This will involve everything from shaping and soldering metal to stringing beads and setting gemstones.
By following these four simple steps, you can create your own custom jewelry piece that is truly one-of-a-kind. So why not give it a try and see what kind of beautiful and unique jewelry you can create?
Step 1: Determine Your Style and Preferences
Creating your own custom jewelry piece can be a fun and rewarding experience. However, before you start the process, it’s important to determine your style and preferences.
1.1. Explore Different Types of Jewelry
Start by exploring different types of jewelry to get an idea of what you like. Do you prefer necklaces, bracelets, earrings, or rings? Look at different styles and designs to see what catches your eye.
1.2. Consider Your Personal Style
Consider your personal style when choosing a design for your custom jewelry piece. Do you prefer classic and timeless designs or something more trendy and modern? Think about the outfits you typically wear and choose a design that complements your style.
1.3. Choose Your Preferred Materials
When it comes to creating custom jewelry, the possibilities are endless. Choose your preferred materials, such as gold, silver, or platinum, and consider adding gemstones or other embellishments to make your piece unique.
- Do you prefer a certain color of metal?
- Do you have a favorite gemstone?
- Do you want to include any special engravings or designs?
Answering these questions will help you determine the materials and design elements that will make your custom jewelry piece truly one-of-a-kind.
Step 2: Sketch Your Design
Once you have a clear idea of what you want your custom jewelry piece to look like, it’s time to start sketching it out. This will help you visualize the design and make any necessary adjustments before moving on to the actual creation process. Here are the steps to follow:
2.1. Gather Your Tools and Materials
Before you start sketching, make sure you have all the necessary tools and materials. This may include pencils, erasers, rulers, paper, and any other materials you need to create your design. Having everything you need on hand will help you stay focused and avoid distractions.
2.2. Start Sketching Your Design
Begin by sketching the basic shape of your jewelry piece. Don’t worry about the details at this point – just focus on getting the overall shape and size right. Once you have the basic shape, start adding in the details, such as gemstones or other embellishments.
2.3. Refine Your Sketch
Take a step back and look at your sketch. Are there any areas that need to be refined or adjusted? Make any necessary changes until you are satisfied with the overall design. You may want to create multiple sketches until you find the perfect design for your custom jewelry piece.
Once you have your final sketch, you are ready to move on to the next step: selecting your materials.

Step 3: Choose Your Gemstones
Choosing the right gemstones is an essential step in creating your own custom jewelry piece. Here are the three sub-steps to follow:
3.1 Learn About Different Types of Gemstones
Before selecting your gemstones, it’s important to learn about the different types available. From classic diamonds to unique and colorful gemstones like amethyst or turquoise, there are many options to choose from. Research the properties of each gemstone, including their hardness, durability, and color, to determine which ones are best suited for your design.
3.2 Determine Your Budget
Determining your budget is also an important factor in selecting your gemstones. Some gemstones can be quite expensive, while others are more affordable. Consider the size, quality, and rarity of the gemstone when setting your budget.
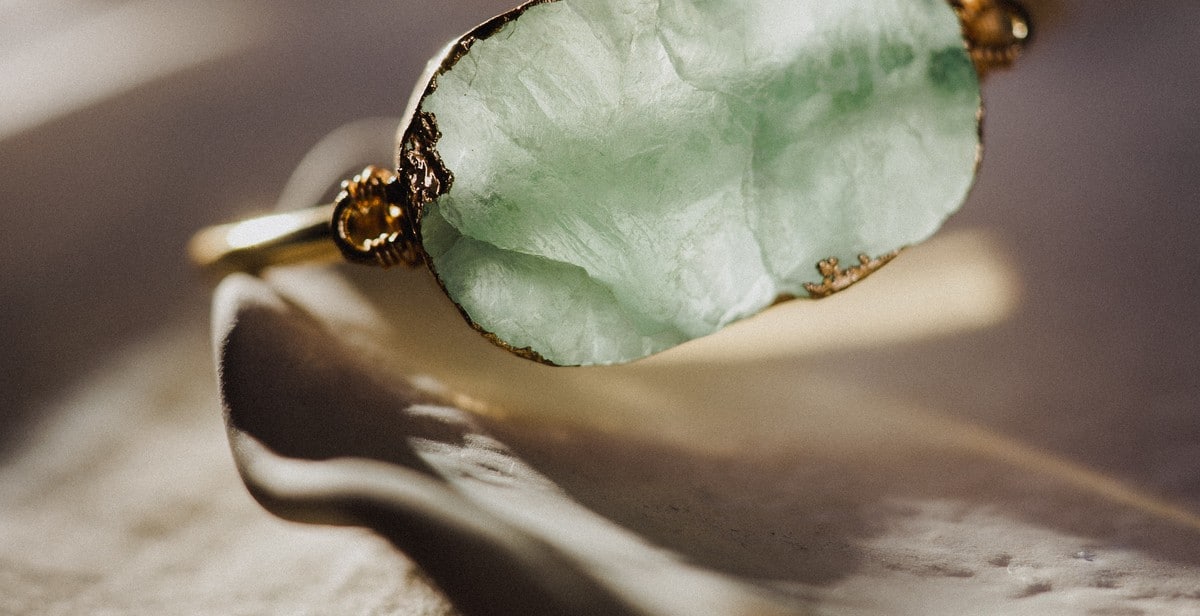
3.3 Select Your Gemstones
After researching different types of gemstones and determining your budget, it’s time to select your gemstones. Consider the overall design and style of your piece, and choose gemstones that complement it well. You can also mix and match different gemstones to create a unique look. Make sure to purchase your gemstones from a reputable dealer to ensure their authenticity and quality.
By following these sub-steps, you’ll be able to choose the perfect gemstones for your custom jewelry piece.
Step 4: Create a Prototype
Before you start creating your custom jewelry piece, it’s essential to create a prototype to ensure that your design is feasible and meets your expectations. Prototyping is the process of creating a preliminary model of your jewelry piece to test and refine your design before making the final product.
4.1. Gather Your Materials and Tools
Before you start making your prototype, gather all the necessary materials and tools. These may include wax or plastic for the prototype, carving tools, shaping tools, and any other materials specific to your design.
4.2. Make a Wax or Plastic Prototype
The first step in creating a prototype is to make a wax or plastic model of your design. This involves carving and shaping the material to match your design’s specifications. You can use a variety of tools to create the prototype, including carving knives, files, and sandpaper.
- For wax prototypes, use a wax carving knife or a hot knife to shape the wax into your desired design.
- For plastic prototypes, use a plastic molding kit to create a mold of your design, and then pour plastic resin into the mold to create your prototype.
4.3. Refine Your Prototype
Once you have created your prototype, examine it closely to identify any areas that need refinement. Use your carving and shaping tools to make any necessary changes to the prototype. Repeat this process until you are satisfied with the prototype and it matches your design specifications.
Creating a prototype is an essential step in the custom jewelry-making process. It helps you refine your design and ensure that the final product meets your expectations. Take your time and be patient during this step to create the best possible prototype for your custom jewelry piece.

Step 5: Choose Your Metals
Choosing the right metals for your custom jewelry piece is essential to achieve the desired look and feel. Here are the steps you need to follow:
5.1 Learn About Different Types of Metals
Before you start selecting metals, it’s important to learn about the different types of metals available. Some of the popular metals used for jewelry making include gold, silver, platinum, titanium, and stainless steel. Each metal has its own unique properties, such as durability, luster, and price point.
5.2 Determine Your Budget
Your budget will play a significant role in selecting the type of metals you can use for your custom jewelry piece. Some metals are more expensive than others, so it’s important to determine your budget before making any decisions.
5.3 Select Your Metals
Once you have learned about the different types of metals and determined your budget, it’s time to select your metals. Consider the style and design of your custom jewelry piece and choose the metals that best complement your vision. You may also opt for a combination of metals to achieve a unique and personalized look.
Remember that choosing the right metals is crucial in creating a custom jewelry piece that reflects your style and personality. Take your time and make an informed decision to ensure that you are satisfied with the final product.

Step 6: Find a Jeweler
Now that you have a clear idea of what you want your custom jewelry piece to look like, it’s time to find a jeweler who can bring your vision to life. Here are the steps to follow:
6.1 Research Local Jewelers
Start by doing some online research to find local jewelers who specialize in custom jewelry. Look at their websites and social media pages to get an idea of their style and the types of pieces they create.
6.2 Check Their Credentials and Reviews
Once you have a list of potential jewelers, check their credentials to ensure they are qualified to create the type of piece you want. Look for certifications or memberships in professional jewelry organizations. You should also read reviews from past customers to get an idea of their experience working with the jeweler.
6.3 Schedule a Consultation
After narrowing down your list of potential jewelers, schedule a consultation with each one. During the consultation, you can discuss your design ideas and get a quote for the cost of creating the piece. This is also a good opportunity to ask any questions you may have about the jeweler’s process or experience.
By following these steps, you can find a skilled and reputable jeweler who can bring your custom jewelry piece to life.

Step 7: Finalize Your Design and Place Your Order
After going through all the previous steps, you should now have a clear idea of the design you want for your custom jewelry piece. It’s time to finalize it and place your order.
7.1 Review and Approve the Final Design
Before placing your order, make sure to review the final design carefully. Ensure that it meets your specifications, including the type of metal, gemstone, and any other customizations you requested. If there are any changes you’d like to make, now is the time to communicate them to your jeweler.
7.2 Place Your Order
Once you’re happy with the final design, it’s time to place your order. Your jeweler will provide you with a quote for the piece, including the cost of materials and labor. Make sure to ask about the payment options and delivery time. Some jewelers may require a deposit before starting work on your piece.
When placing your order, make sure to provide accurate contact information, including your name, shipping address, and phone number. This will ensure that your jeweler can reach you if there are any issues or questions about your order.
7.3 Wait for Your Custom Piece to be Made
After placing your order, it’s time to sit back and wait for your custom jewelry piece to be made. The time it takes to create your piece will depend on the complexity of the design and the workload of your jeweler. Make sure to communicate with your jeweler regularly to get updates on the progress of your piece.
Once your custom piece is ready, your jeweler will notify you and arrange for delivery. Make sure to inspect the piece carefully upon receipt to ensure that it meets your expectations. If there are any issues, communicate them to your jeweler as soon as possible so that they can be addressed.